Creating an Ubuntu-based VM as the Citrix Automation Hub
In this first part of the Citrix Automation series, let´s create an Ubuntu-based VM on Azure with Terraform, Ansible, and Packer installed.
We will use Microsoft Visual Studio Code as a GUI-based tool for writing the code snippets and a standard SSH-based client for writing Terminal-based code.
The planned Citrix Automation deployment will be fully Azure-based using a separate Resource Group.
The Ubuntu-based VM will be the central hub and repository for all code snippets and Automation frameworks installed on the same VM.
Installing an Ubuntu-based VM on Azure
The main part of our Automation environment is the Ubuntu-based VM with all installed Automation frameworks on it.
Therefore we chose a Standard D2dsv5-based Azure VM – the Dadsv5-series VMs are based on the 3rd Generation AMD EPYC™ 7763v (Milan) processor with local temporary storage.
The installed OS is Ubuntu 24.04 LTS – I took the standard Marketplace Image without a GUI – the GUI and RDP were installed later…
The deployment of the Azure-based VM was straightforward.
After the completion of the installation, we added the following packages:
- For GUI: xfce4
- For RDP: xrdp
- For IaC: Terraform
- For Image Management: Packer
- For Image configuration: Ansible
- For Code writing: Microsoft Visual Studio Code
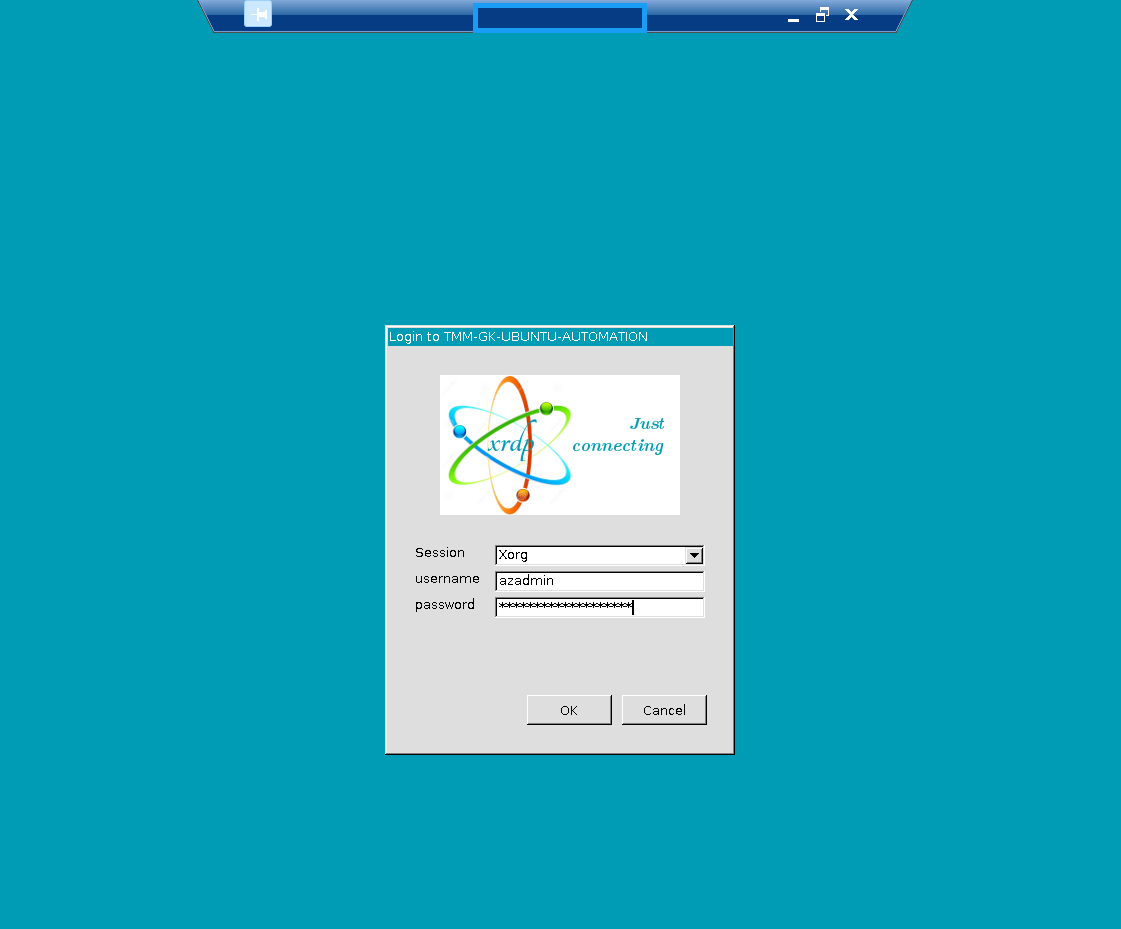
XRDP is working:
Let´s look at the installed versions of the installed Automation frameworks:
tmm-azadmin@TMM-GK-UBUNTU-AUTOMATION:~$ terraform --version
Terraform v1.9.8
on linux_amd64
tmm-azadmin@TMM-GK-UBUNTU-AUTOMATION:~$
tmm-azadmin@TMM-GK-UBUNTU-AUTOMATION:~$ packer --version
Packer v1.11.2
tmm-azadmin@TMM-GK-UBUNTU-AUTOMATION:~$
tmm-azadmin@TMM-GK-UBUNTU-AUTOMATION:~$ ansible --version
ansible [core 2.17.6]
  config file = /etc/ansible/ansible.cfg
  configured module search path = ['/home/tmm-azadmin/.ansible/plugins/modules', '/usr/share/ansible/plugins/modules']
  ansible python module location = /usr/lib/python3/dist-packages/ansible
  ansible collection location = /home/tmm-azadmin/.ansible/collections:/usr/share/ansible/collections
  executable location = /usr/bin/ansible
  python version = 3.12.3 (main, Sep 11 2024, 14:17:37) [GCC 13.2.0] (/usr/bin/python3)
  jinja version = 3.1.2
  libyaml = True
tmm-azadmin@TMM-GK-UBUNTU-AUTOMATION:~$
tmm-azadmin@TMM-GK-UBUNTU-AUTOMATION:~$ apt-show-versions code
code:amd64/stable 1.95.1-1730355339 uptodate
code:arm64 not installed
code:armhf not installed
tmm-azadmin@TMM-GK-UBUNTU-AUTOMATION:~$j
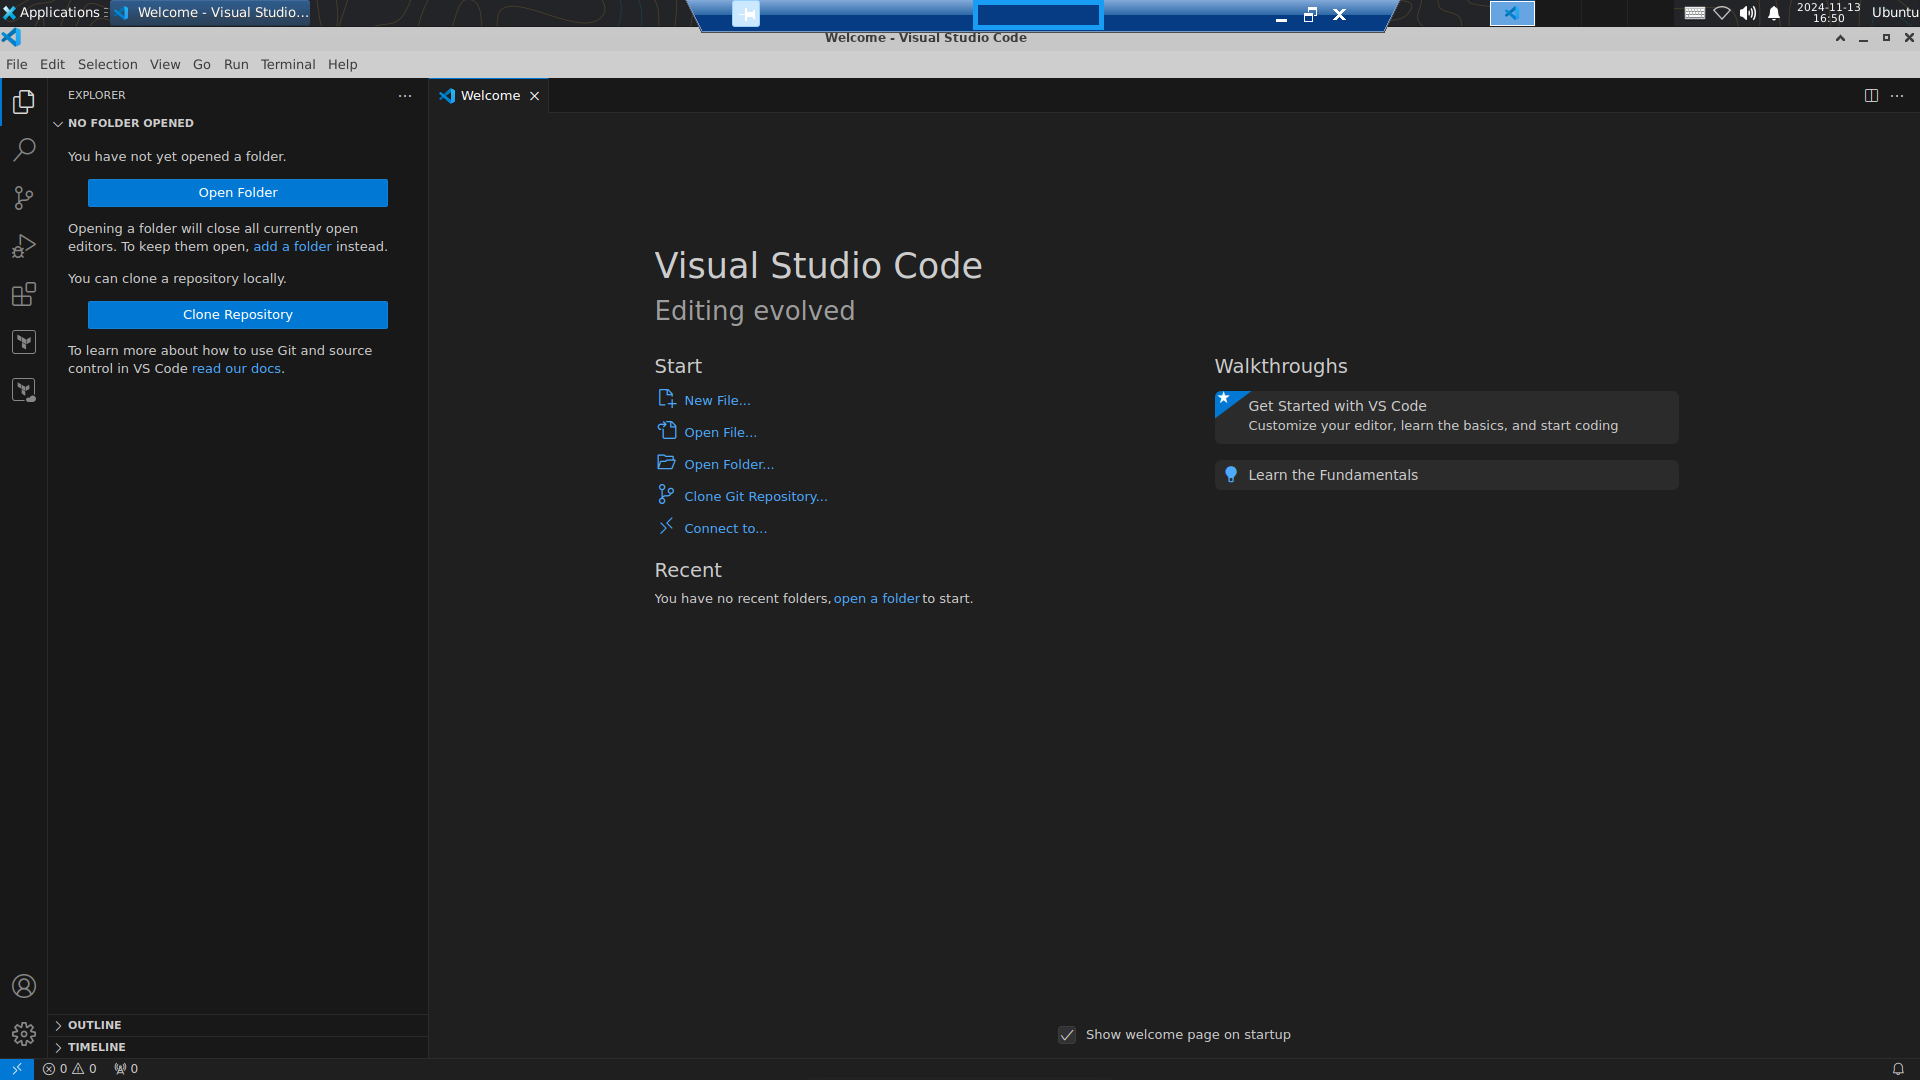
Let´s start Visual Studio Code to initialize it:
Now, the main packages are installed – let´s look at the installed Ansible modules:
tmm-azadmin@TMM-GK-UBUNTU-AUTOMATION:~$ ansible-galaxy collection list
# /usr/lib/python3/dist-packages/ansible_collections
Collection                               Version
---------------------------------------- -------
amazon.aws                               8.2.1
ansible.netcommon                        6.1.3
ansible.posix                            1.5.4
ansible.utils                            4.1.0
ansible.windows                          2.5.0
arista.eos                               9.0.0
awx.awx                                  24.6.1
azure.azcollection                       2.7.0
check_point.mgmt                         5.2.3
chocolatey.chocolatey                    1.5.3
cisco.aci                                2.10.1
cisco.asa                                5.0.1
cisco.dnac                               6.20.0
cisco.intersight                         2.0.20
cisco.ios                                8.0.0
cisco.iosxr                              9.0.0
cisco.ise                                2.9.3
cisco.meraki                             2.18.2
cisco.mso                                2.9.0
cisco.nxos                               8.1.0
cisco.ucs                                1.14.0
cloud.common                             3.0.0
cloudscale_ch.cloud                      2.4.0
community.aws                            8.0.0
community.ciscosmb                       1.0.9
community.crypto                         2.22.1
community.digitalocean                   1.27.0
community.dns                            3.0.5
community.docker                         3.13.0
community.general                        9.5.0
community.grafana                        1.9.1
community.hashi_vault                    6.2.0
community.hrobot                         2.0.2
community.library_inventory_filtering_v1 1.0.1
community.libvirt                        1.3.0
community.mongodb                        1.7.7
community.mysql                          3.10.3
community.network                        5.0.3
community.okd                            3.0.1
community.postgresql                     3.6.1
community.proxysql                       1.6.0
community.rabbitmq                       1.3.0
community.routeros                       2.19.0
community.sap_libs                       1.4.2
community.sops                           1.9.1
community.vmware                         4.7.1
community.windows                        2.3.0
community.zabbix                         2.5.1
containers.podman                        1.16.1
cyberark.conjur                          1.3.0
cyberark.pas                             1.0.27
dellemc.enterprise_sonic                 2.5.1
dellemc.openmanage                       9.7.0
dellemc.powerflex                        2.5.0
dellemc.unity                            2.0.0
f5networks.f5_modules                    1.31.0
fortinet.fortimanager                    2.7.0
fortinet.fortios                         2.3.7
frr.frr                                  2.0.2
google.cloud                             1.4.1
grafana.grafana                          5.5.1
hetzner.hcloud                           3.1.1
ibm.qradar                               3.0.0
ibm.spectrum_virtualize                  2.0.0
ibm.storage_virtualize                   2.5.0
ieisystem.inmanage                       2.0.0
infinidat.infinibox                      1.4.5
infoblox.nios_modules                    1.7.0
inspur.ispim                             2.2.3
inspur.sm                                2.3.0
junipernetworks.junos                    8.0.0
kaytus.ksmanage                          1.2.2
kubernetes.core                          3.2.0
kubevirt.core                            1.5.0
lowlydba.sqlserver                       2.3.4
microsoft.ad                             1.7.1
netapp.cloudmanager                      21.22.1
netapp.ontap                             22.12.0
netapp.storagegrid                       21.12.0
netapp_eseries.santricity                1.4.1
netbox.netbox                            3.20.0
ngine_io.cloudstack                      2.5.0
ngine_io.exoscale                        1.1.0
openstack.cloud                          2.2.0
openvswitch.openvswitch                  2.1.1
ovirt.ovirt                              3.2.0
purestorage.flasharray                   1.31.1
purestorage.flashblade                   1.18.0
sensu.sensu_go                           1.14.0
splunk.es                                3.0.0
t_systems_mms.icinga_director            2.0.1
telekom_mms.icinga_director              2.1.2
theforeman.foreman                       4.2.0
vmware.vmware                            1.5.0
vmware.vmware_rest                       3.2.0
vultr.cloud                              1.13.0
vyos.vyos                                4.1.0
wti.remote                               1.0.10
tmm-azadmin@TMM-GK-UBUNTU-AUTOMATION:~$
The latter most important module “microsoft.ad” is installed out-of-the-box, so there is currently no need to install additional Ansible modules.
As we will mostly configure Windows-based VMs, we need to install Kerberos- and WinRM-related packages, especially pipx and pywinrm – the latter enables Ubuntu to connect to Windows-based VMs using WinRM.
We will discuss the detailed WinRM-configuration of the Windows-based VMs in Part 2…
tmm-azadmin@TMM-GK-UBUNTU-AUTOMATION:~$ sudo apt install python3-pip
...

tmm-azadmin@TMM-GK-UBUNTU-AUTOMATION:~$ sudo apt install python3-dev libkrb5-dev krb5-user
...

tmm-azadmin@TMM-GK-UBUNTU-AUTOMATION:~$ sudo apt install pipx
...

tmm-azadmin@TMM-GK-UBUNTU-AUTOMATION:~$ :/etc/ansible$ pipx install pywinrm --include-deps
...
Now all needed packages for the initial Automation deployments have been installed.
Configuring Ansible
The first step is to configure the /etc/ansible/hosts file of Ansible:
Grouping hosts in different groups allows applying different configurations when running the Ansible Playbooks.
In this example, we create 3 groups – hosts based on IP addresses, based on Server names, and based on FQDNs.
Further, we can define the WinRM configuration for each group – Ansible needs to know how to connect to the respective servers:
GNU nano 7.2          /etc/ansible/hosts

[cloudconnectors-ip]
172.31.4.17
172.31.4.18

[cloudconnectors-nb]
TMM-GK-W2K22-N1
TMM-GK-W2K22-N2

[cloudconnectors-dns]
TMM-GK-W2K22-N1.az.the-austrian-citrix-guy.at
TMM-GK-W2K22-N2.az.the-austrian-citrix-guy.at

[cloudconnectors-ip:vars]
ansible_user=tmm-azxXxXx
ansible_password="!xXxXxXxXxXxXx!Ab2023!1!!"
ansible_port=5986
ansible_connection=winrm
ansible_winrm_scheme=https
ansible_winrm_server_cert_validation=ignore
ansible_winrm_kerberos_delegation=true

[cloudconnectors-nb:vars]
ansible_user=tmm-azxXxXx
ansible_password="xXxXxXxXxXxXx"
ansible_port=5986
ansible_connection=winrm
ansible_winrm_scheme=https
ansible_winrm_server_cert_validation=ignore
ansible_winrm_kerberos_delegation=true

[cloudconnectors-dns:vars]
ansible_user="tmm-azxXxXx@xXx.the-austrian-citrix-guy.at"
ansible_password="xXxXxXxXxXxXx"
ansible_port=5986
ansible_connection=winrm
ansible_winrm_scheme=https
ansible_winrm_server_cert_validation=ignore
ansible_winrm_kerberos_delegation=true
Ansible is now ready to use.
That concludes Part 1 of our Citrix Automation series.
In the next part, we will discuss the deployment and initial configuration of Windows-based VMs – in particular the configuration of WinRM.